Recognizing when your clubs need fresh grips or new shafts
A golf grip is the only physical connection between your hands and the club, meaning subtle surface degradation directly alters your swing mechanics. Over forty or fifty rounds, oils from your skin, airborne grit, and ambient moisture break down rubber compounds. You can tell a grip is overdue for replacement when the surface turns glossy, develops smooth flat spots where your thumbs rest, or feels slick in humid weather. Slippery rubber forces you to tighten your hand pressure, which creates forearm tension and destroys fluid tempo.
Shafts also wear out or sustain hidden trauma over time, though their lifespan differs substantially from grips. Steel shafts often rust from the inside out when moisture settles under the grip cap, or they develop subtle bends near the hosel after repeated impacts against firm driving mats. Graphite shafts can experience structural micro-fractures in the outer composite weave, frequently caused by bag clatter or aggressive extraction from tight cart dividers. If a club suddenly produces a dull vibration or unexpected ballooning ball flight, the internal core has likely degraded.
Evaluating your entire set at the start and midpoint of every season prevents small equipment flaws from creeping into your swing. Testing grip firmness simply requires pressing your thumb into the rubber near the butt end. If the material feels rock-hard or leaves black crumbly residue on your palms, the compound has oxidized. Inspecting shafts requires running a soft microfiber towel along the blank to catch splintering fibers on graphite or sighting straight down the spine of steel to check for slight curvature.
Understanding the real costs of regripping golf clubs
The overall expense to refresh your grips depends primarily on whether you install them yourself or hand the set to a technician. A replacement rubber grip typically costs between six and sixteen dollars per handle, depending on whether you choose basic synthetic compounds, tour velvet styles, or multi-compound cord options. Oversized putter grips tend to sit higher on the pricing spectrum, often ranging between fifteen and thirty-five dollars for specialized ergonomic profiles.

If you use an outside repair bench, labor generally adds an extra three to six dollars per club. That means regripping an entire thirteen-club set typically totals between one hundred and two hundred dollars including materials and service fees. Most shops bundle double-sided tape and solvent into their installation price, though some facilities assess an extra nominal charge for stripping stubborn, petrified layers of aged masking tape left behind on vintage steel shafts.
Choosing the do-it-yourself path lowers your ongoing expenses, especially across multiple seasons. A basic starter kit containing a hooked utility blade, rubber vise clamp, roll of two-inch grip tape, and a bottle of mineral solvent typically costs twenty to thirty dollars. Once you own those permanent tools, your future expenses drop strictly to the price of replacement grips and tape rolls. For players logging forty or more rounds annually who refresh grips every spring, home installation quickly pays for itself.
Step-by-step instructions to replace golf grips at home
Replacing a grip at home requires a steady workspace, a sturdy bench vise, and basic safety gear. Secure the golf club horizontally in your vise using a slotted rubber shaft clamp to prevent crushing thin graphite walls or denting steel. Take a utility knife fitted with a curved hook blade and slide the hooked edge under the bottom lip of the worn grip. Push the blade upward toward the butt end, slicing away from your body so the blade never contacts bare shaft graphite.
Once the old rubber peels away, strip the remnant double-sided tape using a heat gun on low or a mild citrus solvent to soften hardened adhesive. Scrape the metal or composite surface clean with an old plastic card or dull scraper, taking care not to gouge the finish. Wrap fresh two-inch double-sided paper tape down the handle in a gentle spiral or straight overlap, leaving roughly a half-inch overhang past the butt end to tuck neatly inside the hollow shaft opening.
Pour odorless mineral spirits or specialized water-soluble solvent generously inside the new grip while covering the tiny vent hole with your finger. Shake the grip to coat the entire inner sleeve, then dump the excess fluid evenly over the freshly applied tape. Immediately push the mouth of the grip over the wet shaft butt and slide it downward in one fluid motion until the cap bottoms out firmly against the shaft tip. You have roughly thirty seconds to straighten the alignment marks before the adhesive grabs.
Avoiding common mistakes during grip installation
The most frequent beginner misstep is using too little solvent, which causes the grip to seize halfway down the shaft. Once sticky tape locks onto dry inner rubber, pushing the grip any further becomes nearly impossible without tearing the outer wall. If a grip gets stuck, you must quickly slice it off with a hook blade, discard the ruined piece, re-tape the handle, and try again with twice the volume of lubricating solvent.
Another common issue involves uneven stretching during the slide-on phase. Pulling hard on the bottom lip while sliding a grip down stretches the rubber thin, reducing the finished grip diameter beneath lower-hand pressure points. The correct technique involves pushing the grip forward from the reinforced butt cap using your palm, letting the rubber compress naturally into its intended shape and wall thickness. Once seated, confirm the lower edge rests parallel to the ground without twists or wavy seams.
Aligning grip markings incorrectly against the club face can subtly throw off your setup routine at address. Always set the club head flat in its natural square playing posture before pushing the grip fully into position. If you favor a visual ridge, ribbed grips must be aligned with absolute precision down the underside of the shaft. For golfers who frequently adjust adjustable hosel adapters, non-directional round grips without prominent logos are preferable because they can rotate without presenting crooked graphics.
Where to find reputable regripping services in your area
When you prefer professional installation over DIY labor, several accessible venues handle fast turnarounds. Big-box sporting retailers and specialty golf superstores almost always operate a full-service repair counter behind the club racks. These shops stock hundreds of grip models on display racks, allowing you to hold different textures and grip sizes in your hands before committing to a purchase. Turnaround time ranges from twenty minutes for a single wedge to forty-eight hours for full iron sets.
Dedicated practice centers and driving range pro shops often provide an overlooked advantage for equipment service. Many facilities offering on-site club regripping will install fresh handles while you work through a bucket of balls or take an afternoon lesson. Range technicians handle high repair volumes during peak playing months, making them efficient at matching swing weights, adding extra tape wraps to relieve arthritis strain, and advising on moisture-wicking compounds suited to local regional climates.
Independent club builders and PGA professional workshops situated at public golf courses offer another reliable path. While their inventory of exotic grip brands might be slightly smaller than nationwide superstores, their attention to build tolerances is typically exceptional. Master fitters take exact measurements of your hand length and longest finger to calculate whether standard, midsize, or jumbo handles suit your skeletal structure, ensuring you do not leave with an ill-fitting setup.
When and why a golf shaft needs professional replacement
A golf shaft represents the true engine of the club, responsible for managing launch angle, spin axis, and dynamic face closure. While shafts do not wear out simply from hitting clean strikes, catastrophic failures occur when clubs impact roots, cart paths, or hard range dividers. A bent steel shaft cannot be straightened back to true manufacturer spec; metal fatigue weakens the wall, rendering the club inconsistent. Graphite shafts with localized bag gouges should be retired immediately before the composite violently delaminates mid-swing.
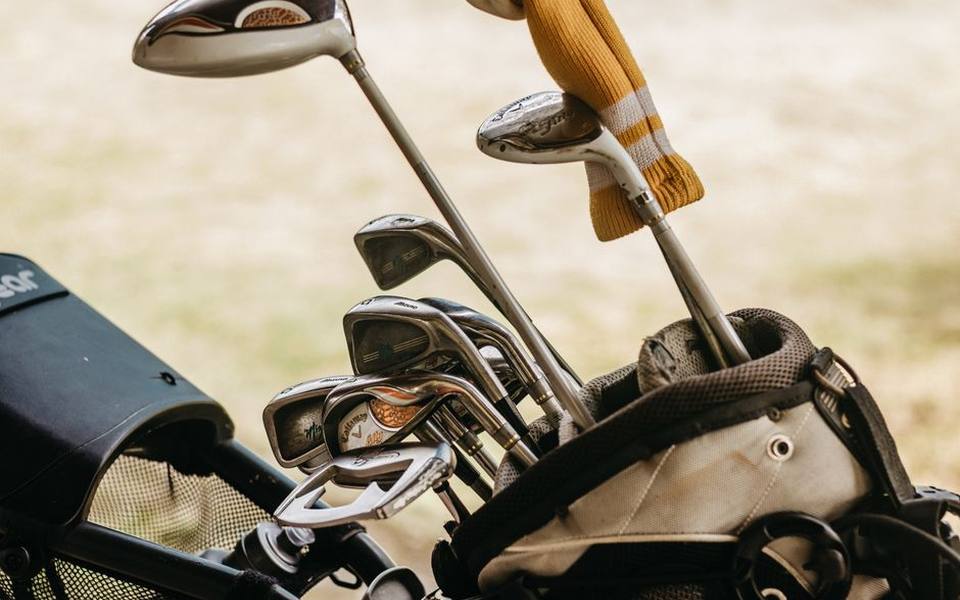
Performance mismatches also trigger the decision to reshaft. As your swing speed evolves through coaching, fitness changes, or natural aging, the weight and flex profile you bought five years ago may no longer optimize launch metrics. Players who identify dispersion issues often visit a specialized studio for professional club fitting to isolate how different bend profiles affect impact efficiency. Upgrading a driver or iron set with properly matched aftermarket shafts can restore distance without forcing a complete club head purchase.
Hosel design trends also play a substantial role in modern shaft replacement. Drivers, fairway woods, and hybrids manufactured over the past decade universally feature quick-change adjustable sleeve adapters. If your driver shaft snaps right at the hosel collar, replacing it does not require buying a brand-new driver head. A technician simply removes the broken tip from your existing sleeve adapter or screws a fresh, pre-tipped aftermarket shaft straight into your current club head in seconds.
How clubmakers disassemble and reshaft a golf club
The reshafting process demands far more precision and specialized tooling than swapping grips. To remove a damaged shaft, a technician must first break down the structural epoxy bond securing the shaft tip inside the hosel bore. Steel shafts require a direct heat gun or butane micro-torch applied evenly around the hosel until the adhesive bond loosens at roughly two hundred and fifty degrees Fahrenheit, allowing the head to be twisted free with a padded glove.
Graphite shafts require extreme thermal care because excessive heat melts the structural resin holding carbon strands together. Clubmakers use a specialized mechanical hydraulic shaft puller that applies constant linear spring tension while gentle heat warms the hosel. The puller eases the graphite tip out in a perfectly straight line without twisting or tearing the delicate composite tip fibers. Once detached, the hosel interior is wire-brushed clean to remove charred epoxy flakes and oxidation.
Installing the new shaft begins with tip preparation. Technicians abrade the bottom inch and a quarter of steel or carefully scrape the outer polyurethane coat off graphite without cutting into load-bearing fibers. After dry-fitting the shaft with a new decorative ferrule to check insertion depth, high-impact two-part golf epoxy is mixed and spread inside the hosel and over the tip. The components are joined, aligned to the player's spine preference, and set aside in a vertical drying rack for twelve to twenty-four hours to cure fully.
Budgeting for shaft replacement and shop build fees
Reshafting costs fluctuate broadly depending on the club type, shaft material, and component pedigree. Standard steel iron shafts typically cost between twenty-five and sixty dollars per shaft blank. Premium graphite shafts engineered for irons and utility clubs generally fall between forty-five and one hundred and twenty dollars. Driver shafts represent the widest spread: basic replacement models sit around sixty dollars, while tour-caliber exotic carbon designs routinely command between two hundred and four hundred dollars for the raw shaft alone.
Labor rates for reshafting reflect the specialized equipment and time required for safe removal and clean installation. A typical repair counter charges fifteen to thirty dollars per club for basic labor, which covers heat extraction, hosel cleaning, tip prep, and epoxy curing. If the technician must extract a snapped shaft stub stuck deep inside an iron hosel bore, shops often add a ten to fifteen dollar broken-tip extraction fee. You must also budget for a new grip and ferrule for each newly installed shaft.
When calculating the total investment, refreshing a broken wedge or driver is almost always more economical than buying a replacement club off the rack. For an iron set, however, replacing eight shafts at seventy dollars per club in parts and labor totals over five hundred dollars. In that scenario, compare your total repair estimate against the trade-in valuation of your current iron set to determine whether rebuilding or upgrading the full set makes superior financial sense.
Testing your refurbished clubs on the practice range
Once your fresh grips have dried and epoxy joints have cured for the recommended duration, schedule an extended session at a dedicated practice center. Heading to modern practice ranges with hitting bays allows you to hit balls under controlled conditions while paying close attention to impact feedback. Fresh grips should feel tacky and secure with minimal finger pressure, permitting relaxed wrists throughout your take-away and release.
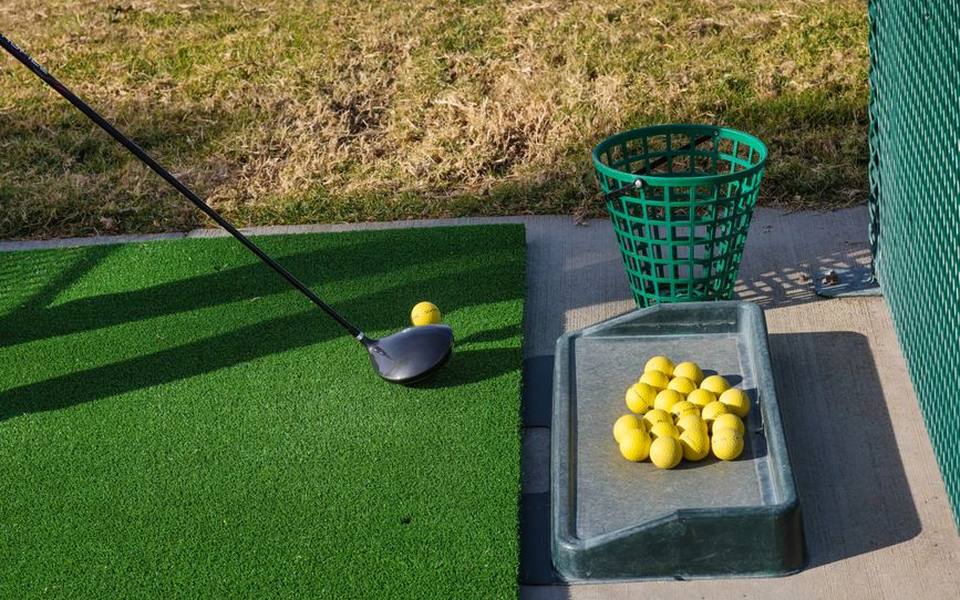
When evaluating a newly installed shaft, pay strict attention to ball flight shape, strike height on the face, and turf interaction. Modern outdoor setups featuring ranges with ball tracking technology yield immediate data on carry distance, launch angle, and spin numbers. Comparing this feedback against your baseline figures reveals whether your new shaft weight and kick point match your swing tempo, or whether subtle lie angle adjustments are needed at the hosel.
Start your test session with partial wedge shots to verify that epoxy bonds hold securely under ground-strike forces before moving to high-speed driver swings. Listen for unusual clicking noises or creaks inside the head, which indicate void pockets in the epoxy bond or an unseated ferrule collar. If the club feels structurally sound and produces consistent shot dispersion over forty clean strikes, the refurbished club is fully ready for tournament play.
Routine maintenance to extend the lifespan of grips and shafts
A few simple habits will easily double the working life of your club components between workshop visits. Rubber grips accumulate sunscreen, sweat, and fairway dirt that clog the micro-texture and accelerate hardening. Wash your grips once a month using warm water, mild dish soap, and a soft nylon scrub brush. Rinse the soap away thoroughly and towel the grips dry; you will be amazed at how quickly original tackiness returns once accumulated skin oils are stripped away.
Environmental exposure represents the primary enemy of graphite resins and grip compounds alike. Never store your golf bag long-term in the trunk of your car during hot summer months. Temperatures inside a sealed vehicle frequently exceed one hundred and thirty degrees Fahrenheit, which softens grip adhesives, loosens ferrule collars, and can cause hosel epoxy to deteriorate prematurely over time. Keep your equipment inside a climate-controlled closet between weekend tee times.
Protecting shafts from cosmetic wear and structural stress requires proper bag organization. Always use full-length internal bag dividers or dedicated shaft sleeves to keep graphite blanks from rubbing against heavy forged iron edges during transit. Wipe steel shafts with a dry towel immediately after rainy rounds before slipping headcovers back on, as trapped condensation under headcovers causes unsightly pitting and rust spots along thin chrome step patterns.
Published 2026-09-20 · reviewed with each rebuild, last September 2026.
Find driving ranges near you
The directory lists 3,693 driving ranges by state and city — pick your state or use the “Near me” button in the header.
More guides
-
 Buying
Realistic Costs and Equipment Needed for a Home Golf Simulator
-
 Money
MoneyGolf Lessons Cost and Beginner Guide: What to Expect and How to Budget
-
 Buying
Golf Club Fitting Cost and Selection Guide
-
 Buying
A Practical Guide to Buying, Selling, and Trading In Used Golf Clubs
-
 Money
MoneyDriving Range Costs, Practice Routines, and Range Etiquette
-
 Service
Fixing Topped Shots and Improving Ball Striking on the Range
-
 Buying
Best Golf Launch Monitors Buying Guide: Space, Tech, and Budget
-
 Buying
The Complete Guide to Buying Used Golf Clubs and Pre-Owned Equipment
-
 Buying
How to Choose the Best Local Golf Shop and Pro Shop Services
-
 Owning
Miniature Golf and Putt-Putt Guide: Rules, Courses, and Family Fun
-
 Service
Complete Guide to Custom Golf Fitting and Shaft Selection
-
 Buying
Complete Guide to Buying and Maintaining Golf Shoes and Cleats
-
 Owning
Designing and Installing Indoor and Backyard Putting Greens
-
 Service
Golf Swing Analytics, Speed Training, and Shot Tracking Systems
-
 Buying
Golf Practice Nets, Driving Mats, and Backyard Hitting Setups
-
 Buying
How to Buy Used Golf Clubs and Get the Best Demo Day Deals
-
 Owning
Custom Golf Gear Personalization: Stampers, Bags, and Embroidery
-
 Buying
Selecting and Setting Up Home Golf Simulators and Launch Monitors
-
 Service
Choosing Golf Academies, Lessons, and Coaching Programs
-
 Buying
Custom Golf Club Fitting: Shafts, Clubheads, and Specifications
-
 Service
Entertainment Driving Ranges: Planning Group Outings, Corporate Events, and Bachelor Parties
-
 Service
Mini Golf, Footgolf, and Indoor Golf: Complete Venue Guide and Directory
-
 Owning
Tournaments, Scoring Tech, and Gear Upkeep: The Modern Golfer's Guide
-
 Buying
Golf Equipment and Club Fitting Guide: Starter Sets, Drivers, and Custom Builds
-
 Buying
Finding the Right Golf Pro Shop and Equipment Retailer
-
 Owning
Designing and Hosting Mini Golf Events: Indoor Party Venues and Practice Games
-
 Buying
Indoor Golf Practice and Launch Monitors: How to Build Your Studio
-
 Buying
Golf Laser Rangefinders Buyer's Guide: Features, Accuracy, and Value
-
 Owning
Golf Club Groove Maintenance: Tools, Techniques, and Equipment Care
-
 Buying
Commercial Golf Green Mowers: Maintenance, Selection, and Buying Guide
-
 Owning
Best Mobile Golf Simulators and Games for Practice and Play
-
 Owning
Fixing Heavy Contact, Managing Distance, and Choosing Cold-Weather Gear
-
 Buying
Club Car Golf Carts: The Practical Guide to Buying, Inspecting, and Customizing
-
 Owning
Complete Guide to Putt-Putt Games: History, Titles, Platforms, and Walkthroughs
-
 Service
Top Sports Bars and Lounges: How to Pick the Best Game-Day Spots in NYC and Florida
-
 Safety
24-Hour Gun and Shooting Ranges: Availability, Rules, and Finding Round-the-Clock Facilities
-
 Owning
Golf Green Mobile Estates: Guide to Golf Community Living and Amenities