The Real Bottom Line on Building a Home Setup
Building a home golf simulator typically costs between $2,500 for a modest DIY arrangement and upwards of $20,000 for a permanent, commercial-grade bay. The exact price depends on whether you opt for portable radar units paired with an iPad or ceiling-mounted photometric cameras running through a dedicated gaming PC and a high-resolution short-throw projector. The market offers viable options at nearly every budget level, but underestimating secondary components often leaves players frustrated.
A functioning simulator requires four foundational elements: a launch monitor to record ball data, an enclosure with an impact screen to arrest full-speed shots, a durable hitting mat that protects your joints, and software paired with a computer or mobile display. If any one of these links is poor, the entire experience suffers. A top-tier tracking unit paired with a flimsy net and a thin mat will quickly cause hand fatigue and room damage.
Before spending anything, it helps to identify how you actually plan to practice. Golfer goals typically fall into two categories: technical game improvement focused on swing numbers or entertainment focused on playing virtual rounds with friends. Clarifying your priority guides where you allocate your budget, ensuring you do not overspend on simulated graphics when pure launch data is what your swing actually needs.
Launch Monitors: Photometric vs. Radar Systems
The launch monitor functions as the central computer of your setup, measuring ball speed, launch angle, backspin, and directional push or pull. In residential settings, hardware typically splits into camera-based photometric units and Doppler radar devices. Photometric systems sit on the floor beside the ball or mount overhead to snap high-speed photographs at the moment of impact. Because they capture the first few inches of flight, camera systems excel in tight rooms with limited depth.
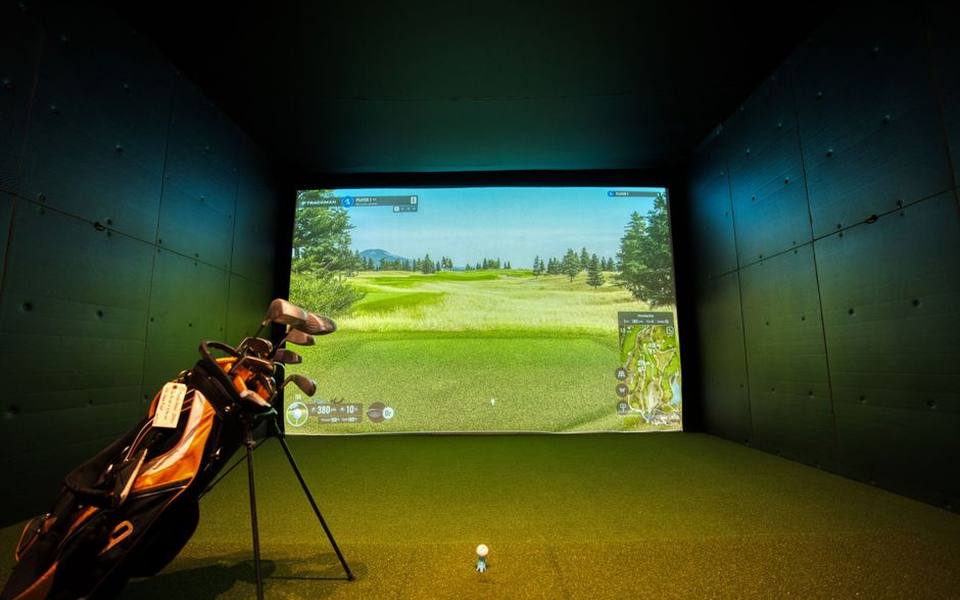
Radar systems sit several feet behind the golfer and track the ball downrange. While modern radar units perform exceptionally well outdoors, indoors they typically require at least eight feet of ball flight between the tee and the screen, plus six to eight feet of clearance behind the hitting mat. If your room lacks total depth of sixteen feet or more, radar accuracy on spin rates can degrade unless specialized metallic club dots or marked balls are utilized.
Floor-based units represent the most flexible entry point, allowing you to carry the device from your garage out to local golf driving ranges and practice facilities. Overhead units require permanent mounting and hardwiring, which increases installation labor, but they leave the hitting floor entirely clear and seamlessly accommodate both right-handed and left-handed players without sliding hardware back and forth between turns.
Hitting Mats and Floor Protection That Save Your Joints
Skimping on a hitting mat is the most frequent mistake new simulator owners make. In a home bay, you hit hundreds of balls off an artificial surface placed directly over concrete garage pads or subflooring. Cheap turf pads lack sufficient shock absorption, transferring blunt impact forces up your wrists, elbows, and lead shoulder. Over a winter of heavy practice, poor cushioning can cause tendonitis and force you to take weeks away from the game.
Quality simulator mats typically incorporate specialized foam layers, gel pads, or replaceable fiber inserts that allow the clubhead to travel slightly downward through impact just like real sod. High-grade hitting surfaces can run between $300 and $1,000, but they realistically last for several years under regular residential use. You can also craft modular floors where a center hitting strip sits inside a broader surround of inexpensive putting turf.
Leveling the stance area with the hitting area is equally important for swing mechanics. Hitting out of an elevated cutout while your feet rest an inch lower ruins your balance and produces artificial swing flaws that bleed into your outdoor game. Building a platform out of interlocking gym tiles or plywood topped with marine carpet creates a flush, professional surface while muffling low-frequency club thuds.
Impact Screens, Safety Nets, and Enclosure Frames
Stopping a golf ball traveling over 150 miles per hour within eight to twelve feet requires industrial-grade textile design. Simulator impact screens typically consist of multi-layer woven polyester that dampens sound, absorbs kinetic energy, and displays an image without excessive creasing. Entry-level single-layer screens are inexpensive but notoriously loud, sounding like a shotgun blast inside a garage or finished basement with every driver strike.
The enclosure frame supports the screen and shields your ceiling, side walls, and electronics from errant shots, toe strikes, and severe shanks. DIY enclosures often use standard one-inch EMT conduit pipes joined by heavy-duty corner connectors, draped in blackout drapery and safety netting. Purpose-built commercial enclosures feature aluminum channels with pre-fitted foam padding across every exposed metal pipe, reducing hazardous bounce-back.
Screen tensioning requires careful balancing. If an impact screen is pulled too taut, the ball acts like a billiard ball rebounding off a rubber cushion, bouncing back toward the golfer at dangerous speeds. If mounted too loose, the ball creates a deep pocket that ruins projection geometry and wears through the screen fabric prematurely. Using adjustable bungees or weighted bottom hems keeps the surface smooth while allowing safe energy dissipation.
Choosing the Right Projector and Managing Room Light
A standard office or home cinema projector is rarely ideal for a golf bay. Most simulator setups require a short-throw or ultra-short-throw projector mounted overhead between the golfer and the screen. This positioning prevents your body and swinging club from casting a distracting shadow across the turf and display. Short-throw projectors typically offer throw ratios between 0.5:1 and 0.8:1, producing a large, crisp picture from only six to eight feet away.
Brightness, measured in ANSI lumens, determines how well the image holds up against ambient lighting. Dedicated darkened basements can manage with 3,000 lumens, but open garages or rooms with windows typically require 4,000 to 5,000 lumens to deliver vibrant colors and readable trajectory graphics. Laser projectors carry a higher upfront cost than bulb-based models, but they run cooler, turn on instantly, and require virtually no maintenance over thousands of operating hours.
Aspect ratio also determines screen sizing and projector pairing. Standard widescreen video runs at 16:9, but many golf enclosure openings work out closer to 4:3 or 16:10 due to residential ceiling height constraints. Matching your projector resolution settings to the native dimensions of your enclosure ensures you fill the entire textile canvas without awkward black bars slicing off the sky or turf.
Software Ecosystems and Virtual Course Play
Simulator software brings your physical shot data to life inside simulated driving ranges, skill combines, and rendered golf courses. Modern software options vary wildly in graphic realism, physics engines, and recurring fee structures. Some platforms emphasize precision fitting data and club delivery metrics, while others prioritize sprawling multiplayer course libraries and relaxed party games for social play.
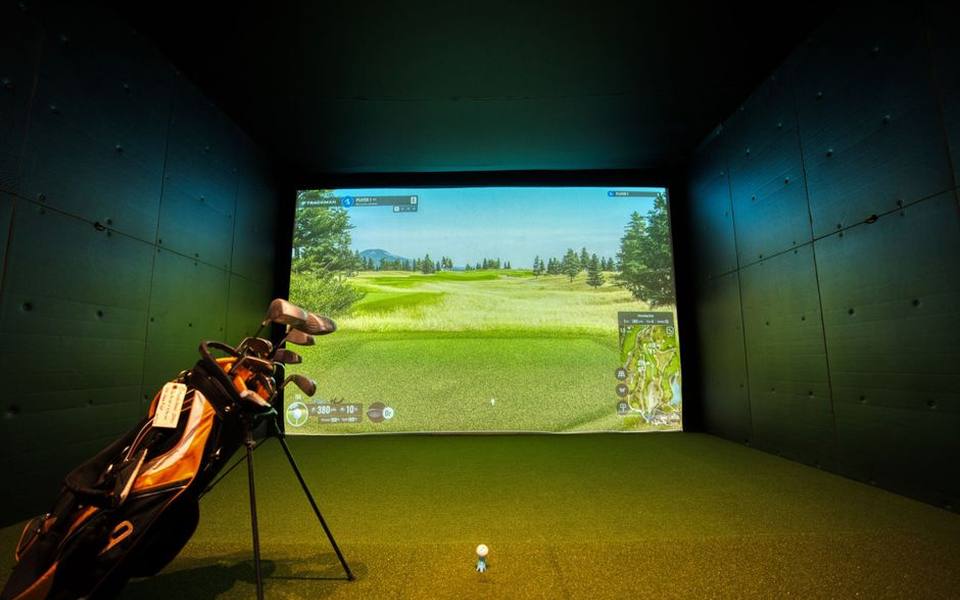
Pricing for software typically follows either an outright purchase model or an annual subscription. Basic driving range apps often ship free with the hardware or cost a modest initial fee, whereas access to thousands of scanned championship courses with dynamic weather and online match play typically requires $250 to $1,000 per year. Factoring these recurring licensing expenses into your lifetime virtual golf budget avoids unwelcome yearly surprises.
Before settling on a software package, compare how real-world ball physics translate on screen. Some titles render chipping and putting with exceptional precision, while others struggle to simulate rollout on tight lies. If you are accustomed to practicing at indoor golf and simulator bays, you have likely experienced how different software brands calculate wind, elevation, and rough penalties on approach shots.
Computer Processing and Hardware Demands
The computing hardware running your simulator depends on the software you select. While entry-level monitors can project simple shot traces to an iPad or smartphone, high-end 4K simulation software demands a dedicated gaming PC. Running complex physics calculations simultaneously with realistic foliage and water shaders requires a powerful modern graphics processing unit, ample system memory, and a fast solid-state hard drive.
A desktop PC built for 1080p simulation typically runs between $800 and $1,300, while a custom rig capable of pushing 60 frames per second at 4K resolution can easily climb beyond $2,000. Many players try to repurpose an aging work laptop, only to suffer from severe input lag, where several seconds pass between the ball striking the screen and the virtual shot launching into the digital sky.
Connectivity also requires proper planning. Launch monitors connect to computers via USB-C, dedicated Wi-Fi networks, or Ethernet. In environments with heavy wireless interference, such as attached garages, running a shielded Ethernet cable directly from your monitor to the PC ensures stable real-time data transmission. Ensuring your space has dedicated electrical circuits prevents tripped breakers when the PC, projector, and auxiliary heaters run simultaneously.
Room Dimensions and Spatial Requirements
Ceiling height is the single most uncompromising constraint in residential simulator construction. To swing a standard driver without hesitation or fear of clipping drywall, a minimum ceiling height of nine feet is required for players under six feet tall, with nine and a half to ten feet considered the gold standard for full, athletic swings. If you have an upright swing plane, anything under nine feet will restrict your motion subconsciously.
Width dictates whether you can position your hitting strip in the center of the screen or if you must offset it to the side. A minimum room width of ten feet allows a centered hit for a single dominant hand, but creating a balanced, ambidextrous bay that serves both right-handed and left-handed players generally requires fourteen to sixteen feet of clear horizontal space. Offset hitting works fine for practice, but centered aim feels far more natural.
Depth considerations depend on the tracking hardware. For camera units, a total room length of twelve to fourteen feet accommodates the player, safety buffer behind the screen, and follow-through clearance. For radar units, target eighteen to twenty feet to allow adequate ball flight and rear sensor clearance. Measuring your space with club in hand before purchasing a single bolt will save thousands in returned equipment.
Realistic Price Tiers and Hidden Expenses
An entry-level budget setup typically runs between $2,500 and $5,000. This configuration generally pairs a reliable entry launch monitor with a mobile device or tablet, a freestanding net, a quality standalone mat, and a modest side protection barrier without a projector. It provides accurate ball metrics and casual simulation without the full-room immersion of a projection bay.
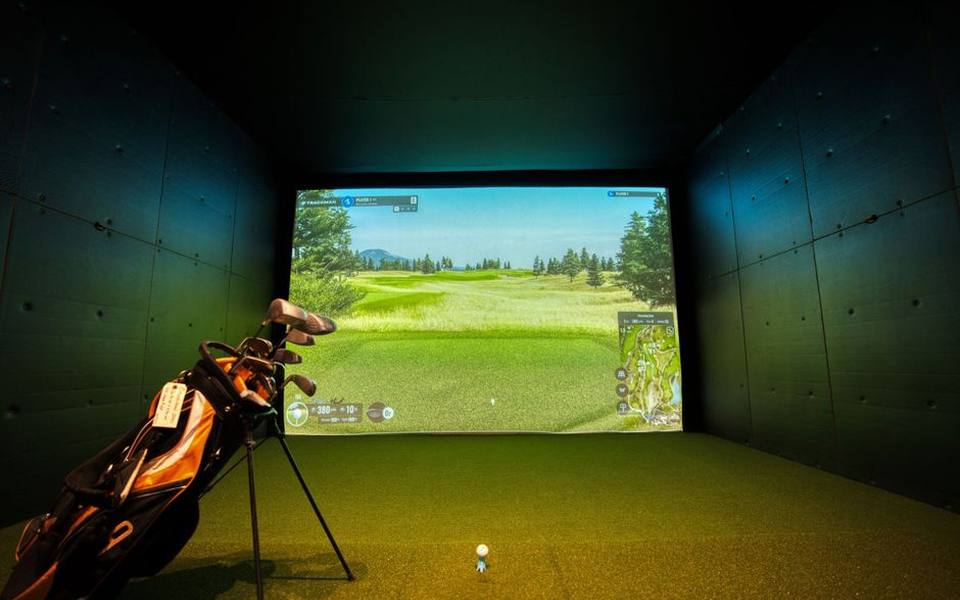
A mid-tier system typically sits between $7,000 and $15,000, representing the sweet spot for passionate golfers. This budget secures an accurate photometric or radar monitor, a custom enclosure with an impact screen, a short-throw 1080p or 4K projector, a dedicated gaming PC, and a tour-grade hitting mat. It looks like a finished home installation and delivers realistic course graphics with minimal input lag.
Luxury custom installations range from $20,000 to over $50,000. These builds feature ceiling-mounted overhead tracking arrays, commercial turf with built-in putting cups, upholstered acoustic wall paneling, and professional calibration. Across all tiers, remember to budget roughly ten percent extra for unexpected hardware needs like heavy-duty extension cords, high-speed HDMI cables, shanks baffles, and ceiling baffle drapery.
Testing Equipment Before You Invest
Before investing thousands of dollars in a home bay, spending time in commercial facilities provides invaluable perspective on hardware reliability. Visiting commercial setups with ranges with ball-tracking technology allows you to observe how different camera and radar systems track your personal ball flight, handle miss-hits, and display shot numbers.
Trying diverse setups also highlights personal tactile preferences you cannot evaluate online, such as the firmness of various turf mats or the acoustic dampening of different screen fabrics. What sounds tolerable on a video demonstration can feel deafening in an enclosed residential basement with concrete foundations.
Furthermore, schedule a session at a facility offering certified club fitting services. Working alongside an experienced fitter on commercial launch monitors gives you an exact benchmark for your true swing speeds, spin rates, and launch trajectories. Having that baseline data ensures that once your home simulator is built, you can verify its calibration and practice with total confidence in the numbers.
Published 2026-09-20 · reviewed with each rebuild, last September 2026.
Find driving ranges near you
The directory lists 3,693 driving ranges by state and city — pick your state or use the “Near me” button in the header.
More guides
-
 Service
Golf Club Maintenance: Regripping and Reshafting Guide
-
 Money
MoneyGolf Lessons Cost and Beginner Guide: What to Expect and How to Budget
-
 Buying
Golf Club Fitting Cost and Selection Guide
-
 Buying
A Practical Guide to Buying, Selling, and Trading In Used Golf Clubs
-
 Money
MoneyDriving Range Costs, Practice Routines, and Range Etiquette
-
 Service
Fixing Topped Shots and Improving Ball Striking on the Range
-
 Buying
Best Golf Launch Monitors Buying Guide: Space, Tech, and Budget
-
 Buying
The Complete Guide to Buying Used Golf Clubs and Pre-Owned Equipment
-
 Buying
How to Choose the Best Local Golf Shop and Pro Shop Services
-
 Owning
Miniature Golf and Putt-Putt Guide: Rules, Courses, and Family Fun
-
 Service
Complete Guide to Custom Golf Fitting and Shaft Selection
-
 Buying
Complete Guide to Buying and Maintaining Golf Shoes and Cleats
-
 Owning
Designing and Installing Indoor and Backyard Putting Greens
-
 Service
Golf Swing Analytics, Speed Training, and Shot Tracking Systems
-
 Buying
Golf Practice Nets, Driving Mats, and Backyard Hitting Setups
-
 Buying
How to Buy Used Golf Clubs and Get the Best Demo Day Deals
-
 Owning
Custom Golf Gear Personalization: Stampers, Bags, and Embroidery
-
 Buying
Selecting and Setting Up Home Golf Simulators and Launch Monitors
-
 Service
Choosing Golf Academies, Lessons, and Coaching Programs
-
 Buying
Custom Golf Club Fitting: Shafts, Clubheads, and Specifications
-
 Service
Entertainment Driving Ranges: Planning Group Outings, Corporate Events, and Bachelor Parties
-
 Service
Mini Golf, Footgolf, and Indoor Golf: Complete Venue Guide and Directory
-
 Owning
Tournaments, Scoring Tech, and Gear Upkeep: The Modern Golfer's Guide
-
 Buying
Golf Equipment and Club Fitting Guide: Starter Sets, Drivers, and Custom Builds
-
 Buying
Finding the Right Golf Pro Shop and Equipment Retailer
-
 Owning
Designing and Hosting Mini Golf Events: Indoor Party Venues and Practice Games
-
 Buying
Indoor Golf Practice and Launch Monitors: How to Build Your Studio
-
 Buying
Golf Laser Rangefinders Buyer's Guide: Features, Accuracy, and Value
-
 Owning
Golf Club Groove Maintenance: Tools, Techniques, and Equipment Care
-
 Buying
Commercial Golf Green Mowers: Maintenance, Selection, and Buying Guide
-
 Owning
Best Mobile Golf Simulators and Games for Practice and Play
-
 Owning
Fixing Heavy Contact, Managing Distance, and Choosing Cold-Weather Gear
-
 Buying
Club Car Golf Carts: The Practical Guide to Buying, Inspecting, and Customizing
-
 Owning
Complete Guide to Putt-Putt Games: History, Titles, Platforms, and Walkthroughs
-
 Service
Top Sports Bars and Lounges: How to Pick the Best Game-Day Spots in NYC and Florida
-
 Safety
24-Hour Gun and Shooting Ranges: Availability, Rules, and Finding Round-the-Clock Facilities
-
 Owning
Golf Green Mobile Estates: Guide to Golf Community Living and Amenities